Showing posts with label pindid. Show all posts
Tuesday, March 11, 2014

Pinday: The Rock Garden

Yesterday was absolutely gorgeous here in southern Virginia. I was lucky enough to spend most of the day outside with my puppies and get a few things done for spring. I picked up sticks out of the yard that had fallen last week in the snow/ice situation, I spread out the bails of hay (for grass in those bare spots) that we used last fall for decoration, and I painted a really reeeally old bench for the rock garden that me and my mom are vamping up this spring. After painting the bench, I was inspired to write a "Pinday" post about my rock garden inspiration.

#1
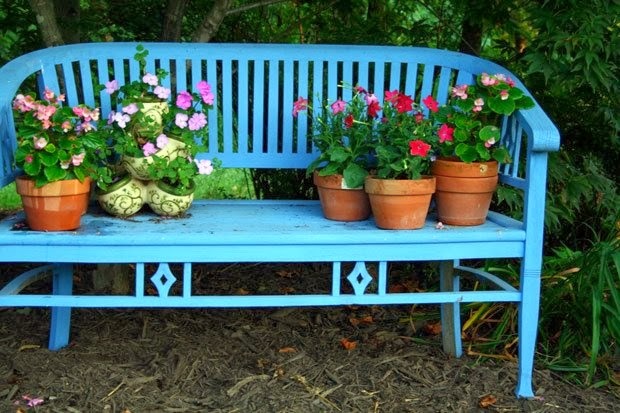
This bench inspired this whole project I believe. It is so happy, clean, bright, and summery. It is the exact color I spray painted my bench yesterday (I had some leftover spray paint from when I painted an ugly clearance lamp a few months ago). So this pin was inspiration for a project that took me exactly 10 minutes and a sunny day to complete!
I promise I will post pictures of our garden when it is finished.
 
http://www.virginialiving.com/blogs/virginia-living-blog/blue-garden-benches/
Virginia Living


#2
This adorable fairy door has my heart. *sigh*
It was originally from Etsy, but is no longer for sale.
Yep, I'm totally DIYing this.
 
Etsy
 
#3
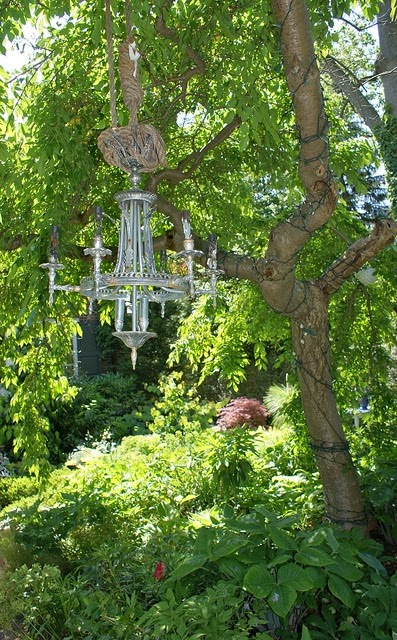
We are planning to hang a chandelier also. Eeeekk!
It's going to be painted red. Oh yes.
It definitely doesn't look like this, but you get the point. We were actually given a chandelier not too long ago, so I'm just waiting to get a can of paint to get to it!
 
http://www.flickriver.com/photos/karlgercens/sets/72157625026747573/
Flickriver
 #4
Yes, there is a number four today, because I can(:
I'm on the lookout for some free brick...
 
Source: Unknown
 
Are you already planning for spring? Any cool projects?


Sunday, February 9, 2014

101 In 1001: DIY

Hey Y'all!
I hope you are having a great weekend! I just wanted to share a DIY post on a few of my crafts that I have started working on for my project.
Honest to goodness, these have probably turned out the best of the many DIY projects that I have tried. So, it's kind of like a big deal.
 
#1
I follow Sarah at Life On Virginia Street, and can I say that her office is a-mazing? She just shared a post on her office reveal, and it truly is beautiful. I had seen this beautiful painting behind her desk and thought how pretty it was. Luckily, she shared a DIY post a few days later (Que angels singing).
 
 
Life On Virginia Street
 
Her color combo is perfection. It's light, airy, and pretty.
I really like the idea of a thin frame too. It makes it look like a professional piece of artwork.
 
I knew that I wanted to paint a huge canvas to put over my bed since I don't have a headboard. My walls are a very light blue, almost cloudy, so I needed to use bold colors to keep my room from feeling like you are walking into a cloud when you open the door. It needed balance, no matter how much I loved the blue+green color combination.
 
Before going to buy my supplies, I looked online at a few craft stores nearby to see what specials they had going on. A. C. Moore had a few specials going on including a couple coupons that you could print and take to the store, and Hobby Lobby had almost the exact same special. I chose Hobby Lobby because the selection is HUGE and I was closer to it on Thursday. I was able to score 30% off my paints, and a coupon for 40% one regular priced item.
 
(Please excuse the lovely professional photos, my camera hates me)
If you would like a detailed post, view Sarah's here.


(I got excited when I started painting and didn't take any pictures...)


#2
I was walking through the JCPenny Home department and saw a few bins with 60-70% off signs. As I was looking, I found some lovely white mugs. They were originally $10 each, but with the discount, I only paid $2 each. I decided to attempt the "sharpie-on-mug" DIY project again. My first attempt was a disaster, imagine lots of time spent drawing and then sharpie washing right off.... :(
I didn't spend half as much time drawing this go-round, and I baked those puppies forever.
(@ 350 for about 45 minutes)
 
Well, they have started chipping already, but I don't even care. They are cute.
 

Inspired by this one.

Inspired by the much cuter one.


Did you try any DIY projects this week?


Tuesday, January 28, 2014

It's Pinday

So, today is my first "Pinday"... & I'm excited about it.
Have you ever looked at the number of pins that you have on Pinterest? Or the number of pins that you have liked? Yeah, wowza. My numbers are aroundabout 2,000 pins and 700 likes. Yikes.
Every time I pin something, I tell myself, "I should wear something like that" or "yeah, I'm doing that" or "HAHAHAHA"(at something inappropriate)
I have actually only followed through with probably 20 pins. Some actually aren't so bad! But of course, most are #pinstrositys.
I'm going to pick 3 fabulous pins, and ooooh and ahhhh about doing it one of these days.


#1
This bedroom that I have been in awe of for months. That wall. Mmm.


Owen's Olivia


#2
Let's be honest, if you throw Hunter boots into any picture, it becomes 100x better.


#3
A couple words that are nice.


That was fun, let's play Pinday again sometime!
If you would like to join me, leave a comment with the link to your site below so I can see.


Wednesday, September 11, 2013

Chalkin

Chalkboard painting everything I can find.

That's what happens when you have leftover chalkboard paint. My painting began when I needed signs for the farmer's market this summer. I wanted them to be chalkboard painted, but I didn't want to spend 30$ on the supplies to make the paint myself and possibly mess it up in the process. I found myself at Lowes looking around for cheaper options when I happened to spot this little guy sitting on the paint desk.


How convenient. The pint was about $7, which is a much better price than $30, a big mess, and a possibility of my diy mix not working.
I bought it.
The color selection was really weird to me. When I think of chalkboard paint, I think black, grey, dark colors. The selection that I had was bright. B-r-I-g-h-t. I'm talking hot pink, turquoise, lime, etc.


The only color that was darkish was navy baby. Dohkay. I'll take it.
Some how I made it work. My signs turned out adorbs. But I had so much extra paint. Like the thing was still full. So what did I end up doing? Chalkboard painting everything I could find.
It first started with this piece of wood that was left over from a baby shower last weekend, then it trickled into my room (that I'm giving a new do...in a few posts.)


It was rough. I needed to sand-er-down to baby smoothness. I used a palm sander, starting with P90 grit and sanded until smoothish, then changed the pad several times until I finished with 320 grit. We are talking smooooooth.


I am really thinking that I needed to use some sort of sealer, or primer? Maybe? I have no idea, so I went ahead with the process anyways without asking anyone...or googling. There was a hole in the center of the wood, so I used puddy to seal it up. Wham, bam, done.


Paint paint paint. I painted all the way to the bark because I thought it looked better. Two layers works best and makes sure that it is sealed all the way. I always make sure to let the paint dry for 24 hours before writing on it that way I know it won't smear, or dent the paint.


The door:


My first thought on my bedroom closet door was to take it down and do something cool with my closet, but I reeeeally wanted to chalkboard something else. Hey, if it doesn't work out, I can always take the door down like I had originally planned.


This one is easy.
Tape.


Paint x 2.


Doneee.


I'll keep my instagram up to date with the new artwork<<<

Love always,
M
Wednesday, March 6, 2013

Not-So-Attacking Lower Ab


Continuing in  my quest to actually do some of my workout pins, the next pin on me list was this Lower Ab Attack.
Needless to say, it wasn't so much of an attack, but that could have been because I don't know what a roll-up, flutter kick, or lunge twist is. I took the terms and made my own version. It was semi-tough, but it didn't get me sweaty or out of breath, which is how I judge my workouts.
 
I began with a typical warm-up then started the workout. About halfway through, I decided to give my abs a break and did some leg/arm exercises.
When I completed the plan, I felt like I had just started warming up (I'd like to say it's because I am in such good shape, but that would be a lie), but like I said before, if I'm not sweaty and out of breath I don't count it.
 
My point may be: this is a great, quiet, easy exercise.
I approve.
 
Try it for yourself and let me know what you think!
Loves--M
Tuesday, March 5, 2013

A Little Fabric Flower

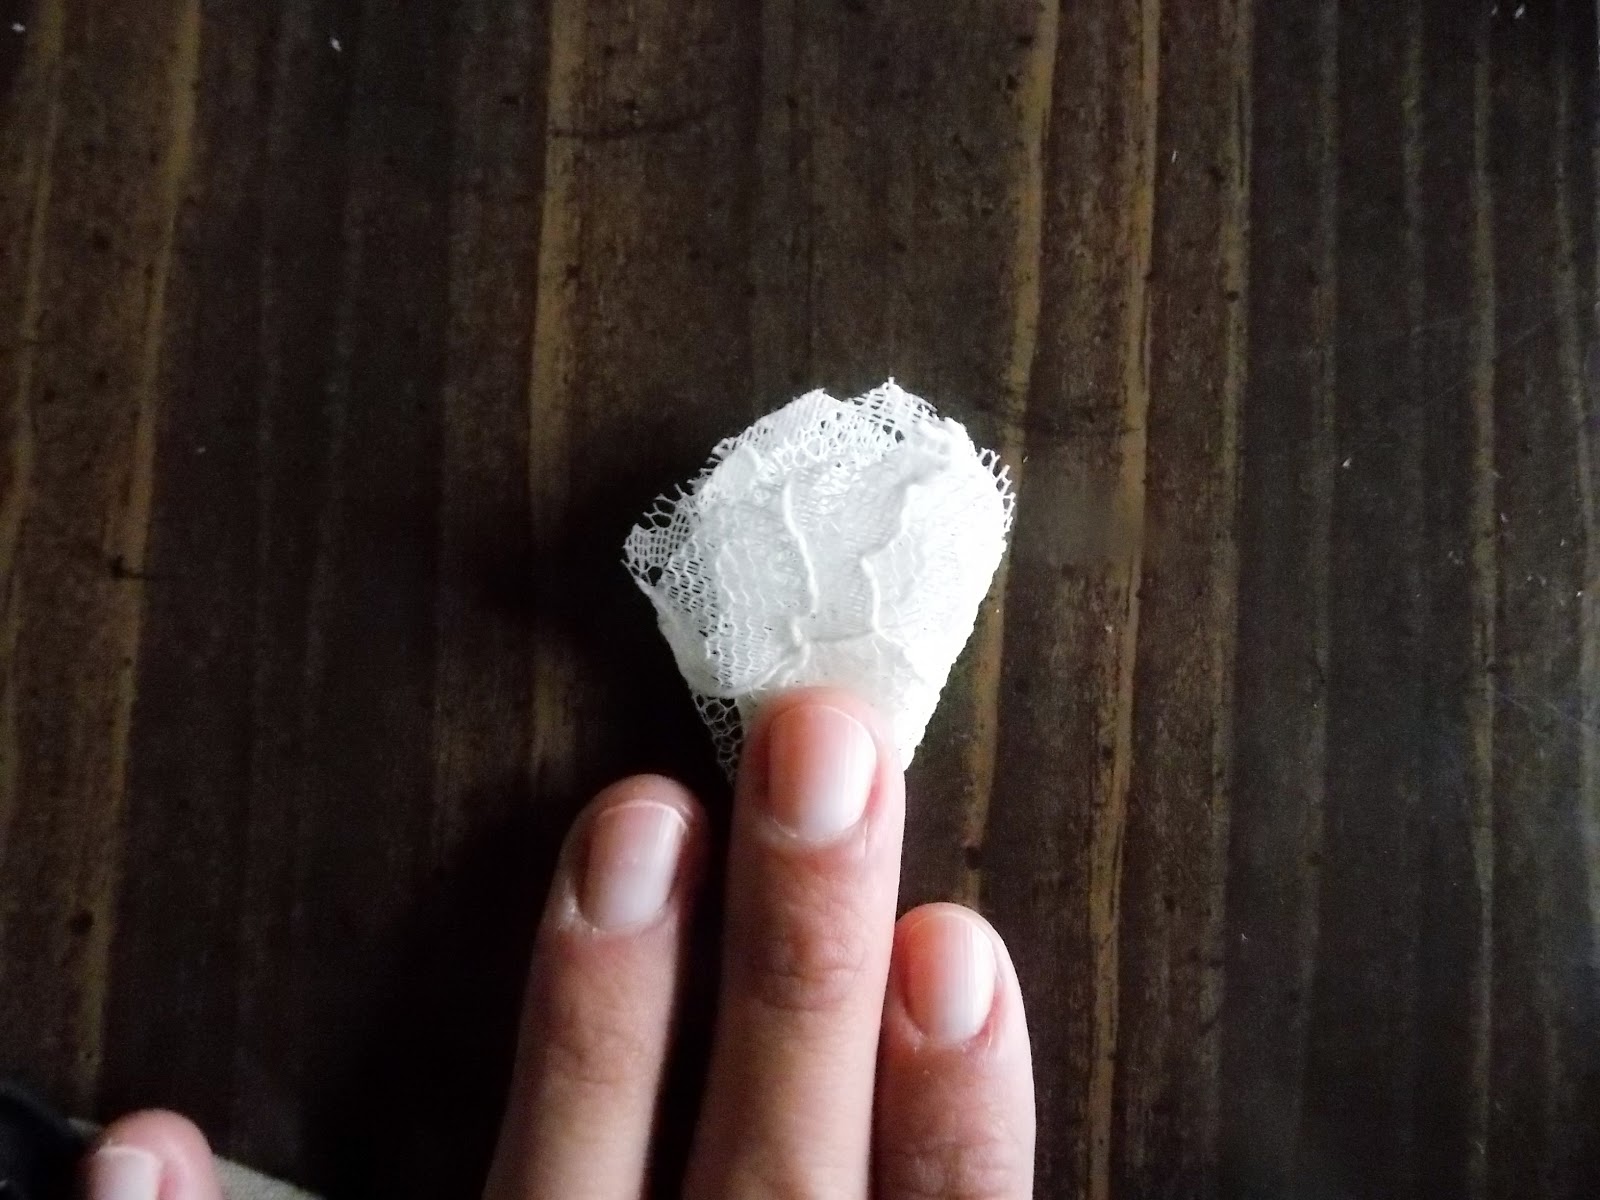
I am making fabric flowers for my boyfriend's sister's wedding, and I am so excited! Before now I had never made a fabric flower, but did that scare me? a little....no. After browsing my Pinterest DIY board, I noted several different techniques and went to work.


This is what I used:
   Fabric--lace and sheer champagne
   Scissors
   Quilting thread (more dense and durable in my opinion)
   Needle

Step 1:

Cut Fabric.
For my base piece, I used the lace because it was more sturdy. I cut it about 4x4 (which will end up about a 3 1/2 inch flower). Each layer afterward about 1/2 inch smaller, rotating fabrics.
About 6 layers was all I needed.


Step 2:

Make petals.
Fold the squares (the same way you would fold paper to make a snowflake:))---half, half again, then once more diagonally.
You should end up with something like-

Cut the end to be round and even.


Step 3:

Layer.
Align the pieces of fabric in larger to smaller order.


Step 4:

Stitch.
Sew a small stitch into the middle of the flower to hold pieces together then fold in half.
Sew several stitches into the fold to bring the flower together.


In this part of the project, you will need to see what looks best for your flower, fold the middle in different and complementing directions and make stitches accordingly. I find that pinching different areas and then stitching what looks right works the best.
This step should bring the petals together and give the flat flower depth and life.

 
Turn your flower over and fluff!


That's it! Enjoy! xoxo-M


Wednesday, February 27, 2013

The 100 Workout

I see little workout plans all the time on Pinterest, but do I ever actually do them? Of course not.
 
I love exercising. Like love-love. I played volleyball and soccer in high school, but since then it has been a whole lot of nothing. I finally convinced myself to start doing something-anything. I had the Jillian Michael's Ripped in 30 DVD already, so I decided to start with that. I am very proud to say that I have completed the entire 4-week program! Yay me! But now, it has been a week and I have not exercised even a tiny bit, and I am eating a whole lot of junk.
Perfect answer? Take a look at all the fitness pins that I have and actually do some.
So here is the first:
 
 
I started with a warm up, bits and pieces of random warm up moves that I have learned to warm my major muscles before I started the workout.
When I began the actual workout, it dawned on me that there was absolutely no way that I could do 90 crunches in a row....I'm not Iron-woman. I divided the entire workout.
Here is what I actually did:
3-5 minute warm-up
50 jumping jacks, 45 crunches
40 squats, 35 leg lifts
30 jumping jacks, 25 crunches
20 squats, 15 leg lifts
20 jumping jacks
10 minutes of running
2 minutes cool-down walk
3-5 minute stretch
 
Notice that I still did the right number of everything, just divided up a little better.
I noticed while I was doing the workout, my arms weren't getting much exercise. I think that adding a weight during the squats and pressing them above your head while doing squats would fix that problem
 
In the end, I thought this was a totally cool workout!
Good job Pinterest, I am satisfied.

Tuesday, February 26, 2013

Help for My Dresser

Hey there readers, bloggers, browsers, and whoever you are!
It seems like decades since I have posted anything on my blog, I have been hanging out at The Married Life Blog as a DIY blogger! Yay me!
So this is what I've been up to:
Fixing up an old beautiful 1930's dresser. I don't have any pictures to share right now because I am too lazy to take them.  But, I hope to finish it soon so I will share ASAP. So, the point of this post is to get your input. (If you are out there) I have decided to paint it white, give it a new top (stained wood), and distress the whole thing. Have a picture of it in your head yet? My question is about knobs. I have found some adorable knobs.
 
Both from Pinterest-Anthropologie
 
Here's the plan, I get two totally cute knobs and four pulls. Any ideas where I could get knobs or pulls that aren't boring? Anybody like these?
 
Let me know what you think(:
 
-xoxo M
 

Wednesday, December 12, 2012

Thriftin it up.


So I was inspired by this woman's blog, you can see it here..she takes awful, thrift store, old, out of date clothes and turned them into cute unique finds! I decided that I was going to do that too. I found this awful thing at our friendly local Goodwill....
 
It is floral, it had shoulder pads and it wasn't a dress...it was made into shorts? Ewwww.....but I thought it was perfect for my first up-cycle! With a little work, I ended up with a totally cute dress!
The first thing that I had to do was take out these shoulder pads.
 
Next was fixing the shorts. It was a little bit tricky, but after getting all of the stitching out, it was more like a puzzle.
After getting all of the old stitching out of the way, I pinned the fabric in place to where it would be a skirt. A few stitches were all that it needed after that!
 
Thankfully, the jumpsuit/dress already had ties attached at the back that I was able to tie into a bow and give it a better silhouette. I debated taking the sleeves off, but decided that I had better not do too much...I would probably ruin it. Also, the fabric didn't seem to be right with no sleeves (I know, random reason, I guess I'm just too picky!)
So here we go! I have a cute dress that is unique, cheap, comfy and mine! It looks super duper cute with a jean jacket(:
It cost me a total of $3.68 and about thirty minutes. I think I have just found a new favorite hobby(:
 
PS..I'm sorry about the awful picture color/quality...I need to learn cameras a little better.